Get started with LaraKube Desktop
LaraKube Desktop is an app for creating servers, installing your team's tools on them and starting apps, without a terminal. It runs the LaraKube CLI for you, so everything it does can also be done from the command line.
1. Download it
Go to the download page. It detects your system and offers the right file. Pick Stable for a released version, or Canary for the newest build, which may be broken.
- macOS: open the
.dmgand drag the app to Applications. The build is not signed yet, so right-click the app and choose Open the first time. - Linux: make the AppImage executable and run it, or install the
.deb. - Windows: see Windows (WSL).
2. Let Setup install what it needs
The first time you open the app it takes you to Setup. Setup first asks what the computer is for:
- Install tools on a server: create servers and set up chat, a wiki, sign-in and more. Nothing runs on this computer.
- Build and run apps here: the same, plus creating apps and running them on this computer.
Setup then checks your computer and shows what is missing.
| Tool | What for | Installed by |
|---|---|---|
| LaraKube CLI | Runs every action in the app | Setup, one click |
| kubectl | Talks to your Kubernetes clusters | Setup, one click |
| OpenTofu | Creates new cloud servers | Setup, one click |
| AWS CLI, Google Cloud CLI | Only for servers on those clouds | Setup, one click |
| Podman (Linux and WSL) | Builds your apps before deploying them | Setup, one click |
| Docker | Same job, instead of Podman | You |
| Git | Needed to deploy Laravel apps | You |
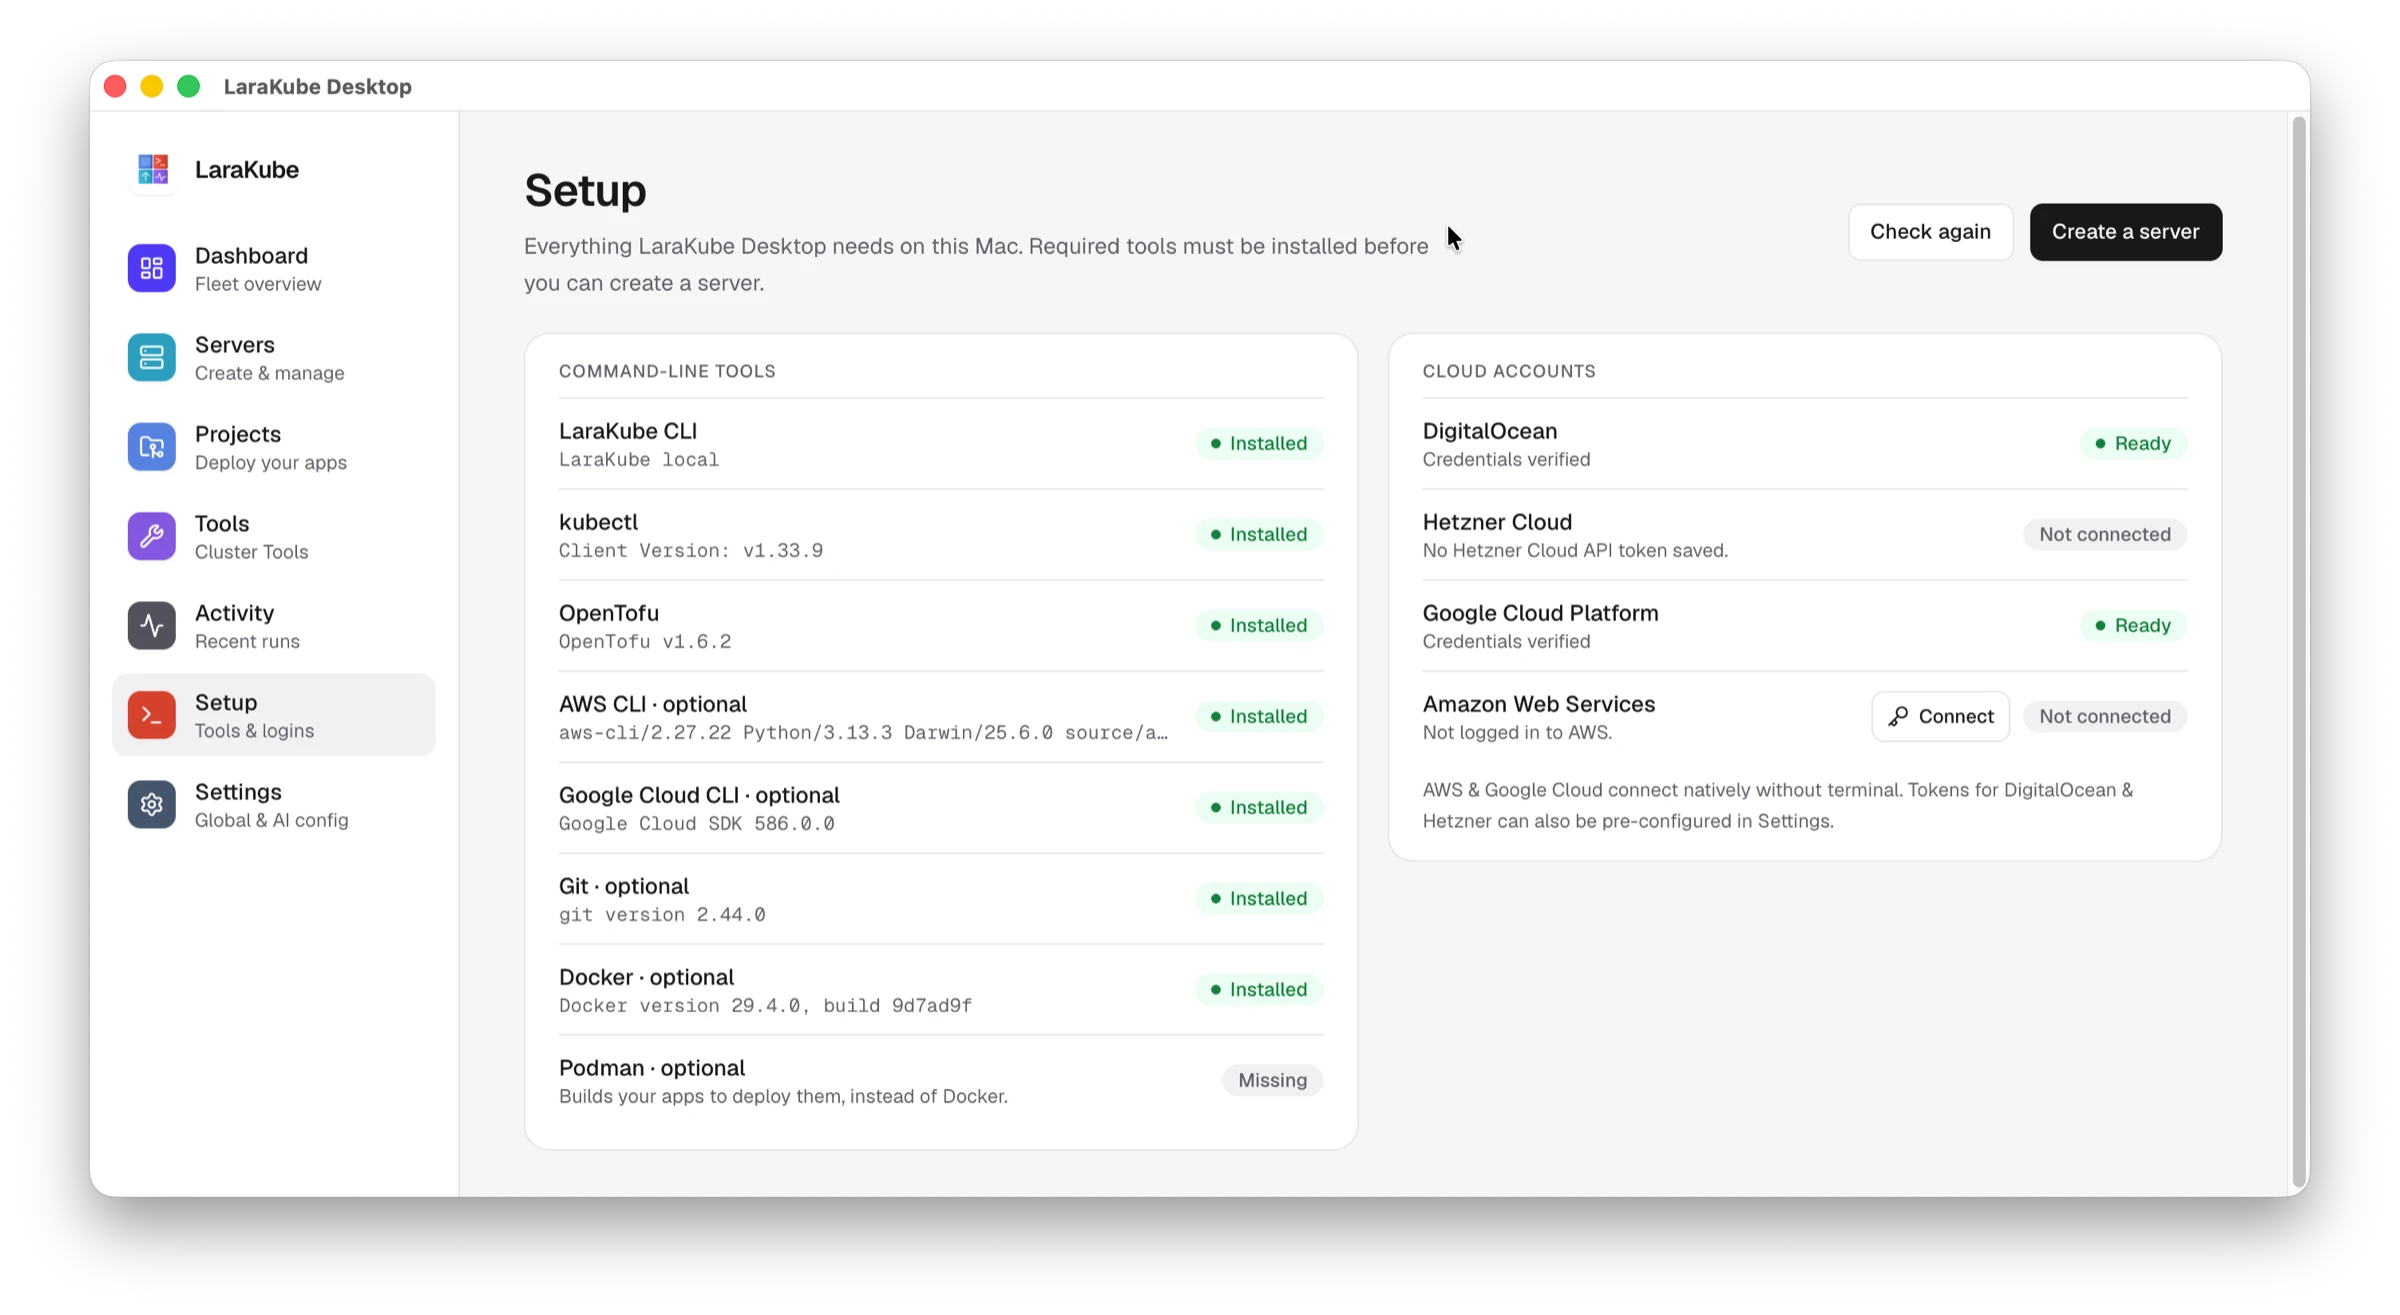
If you chose to build apps here, press Set up local development. It installs a local Kubernetes cluster (k3s) and needs administrator access for a few minutes. Desktop allows that only while the setup runs and removes it afterwards.
Setup also lists your cloud accounts. DigitalOcean and Hetzner use an API token that you save in Settings. Amazon Web Services and Google Cloud connect from Setup itself.
3. Create a server
Open Servers → Create a server, choose a provider, name the server, and pick a region and size. You get a single-node Kubernetes server (k3s), hardened and ready for Cluster Tools. It takes about five minutes and is billed by your provider. See Servers.
4. Install a tool
Open Tools, choose your server and press Install on a tool, for example chat, a wiki or single sign-on. See Tools.
5. Start an app
Open Projects → New project, pick a framework and create it. See Projects.
Prefer the terminal?
Everything Desktop does is a CLI command. Desktop shows each action it runs under Activity, so you can see exactly what happened.